We expend a lot of energy fretting over brakes – and with good reason. Decent stoppers are indispensable on hard-ridden sportsbikes and never more so than on today’s congested roads. Rather than swapping them, it’s often better and cheaper to work with your bike’s original calipers. Here’s how to get the best from them...
When it comes to our older bikes, brake upgrades have become almost an obsession. Ridertips postbag and email inbox regularly contains questions regarding which calipers might fit which bike in the interests of better stopping, but when it comes to swapping calipers we often suggest that the most effective solution, from both an economical and efficiency point of view, is to overhaul the calipers you’ve already got.
In combination with good pads and hoses and a properly functioning master-cylinder, you’ll probably be amazed at how good the original fitment calipers are and by how much they’ve gone off, either through age or irregular maintenance.
Over time pistons start to bind and even seize in the calipers, and braking efficiency reduces. The rubber seals around the pistons can also start to degrade. A caliper overhaul involves relatively routine processes. However, as brakes are of paramount importance, be sure you’re comfortable with what you’re doing.
Tools for the job : Allen key. Torque wrench. Brush. Brake cleaner. Rubber or silicon grease. Nylon abrasive pad. Piston tool. Engineers pick.
Cost : Piston pliers cost from around £20 while the slide hammer removal tool used here typically retails at £80 – a worthwhile investment if you plan to make a habit of this type of thing. Brake cleaner is around a fiver a can. You’ll need about eight quid for a half-kilo tub of rubber grease.
The Guide
 |
| A game of two halves : For the pistons to come out of this opposed-piston caliper, divide it into its two halves first.With the pads removed, clean the worst of the dirt off before using an Allen key to undo the bolts joining the caliper together. They’ll be tight so it might be easier to reattach the caliper to the fork. |
 |
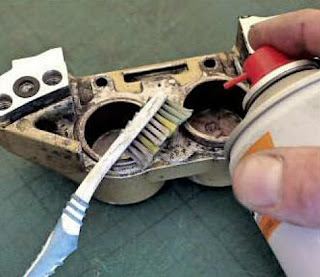
| Do it clean : As the object of the exercise is to get everything clean and working properly, we don’t want to get any dirt inside the calipers. Brake cleaner and an old toothbrush applied around the area where the pistons fit in the caliper will get rid of the worst of the grime. It might take some time, though... |
 |
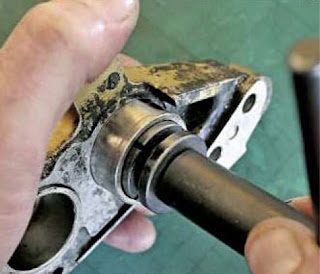
| On the pull : Now the pistons can be extracted. A piston puller such as this Laser Tools one makes life easy, or there are cheaper specialist pliers available. If you’re careful you might get away with a pipe wrench and some rag. Whichever way you do it, you need to be sure to avoid damaging the pistons unless you’re fitting replacements. |
 |
| Pick it : Remove the old seals using an engineers pick to lessen the chances of damage to the grooves they sit in. Don’t be overly concerned about not damaging the seals themselves, as they are going to be replaced. Keep the pick handy – we’ll be needing that for the next step. |
 |
| Bit of a scrape : In order for the piston seals to seat correctly in the calipers, the grooves they sit in must be thoroughly cleaned out. These are likely to be full of white corrosion. Be gentle as you don’t want to damage the grooves, but they must be clean. If the seals don’t seat right, the pistons will bind. |
 |
| In with the new : Wipe a smear of silicone, rubber grease or brake fluid around each seal before inserting it. Make sure they’re correctly in their grooves. Sometimes the outer, thinner dust seals try to roll around or bunch up, so some patience is required. If you have the correct seals, they will go in. |
 |
| Piston polish : Inspect the pistons closely for any signs of pitting or damage on that part of their circumference where they travel inside the caliper. Remove any corrosion from the pistons’ outer lips and if they have pitted, make sure the damaged area won’t catch the seals when the pistons are retracted. |
 |
| Piston in : The pistons are, by necessity, a very close fit to the calipers and seals, so will only go in when they’re dead square. Again a little rubber, silicone grease or brake fluid is a good idea. Don’t force them or you risk damaging the seals. Using the piston tool or pliers to rotate them slightly often helps. |
 |
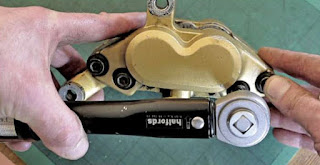
| Together again : Check that the mating faces of the caliper halves are clean and use a new washer or O-ring if the old one is perished, damaged or compressed. Fit the bolts, taking care not to displace the O-ring, and tighten the caliper joining bolts evenly, finishing off with the torque wrench. Refit the caliper and enjoy your bike’s brakes at the best they’ve been for years. |


